So you've decided to take your woodworking skills to the next level and build your very own router table. Congratulations, my friend! Now, before you start envisioning yourself as the next Bob the Builder, let me warn you - this project might just test your patience and sanity. But fear not, for I am here to guide you through this journey of sawdust, splinters, and occasional profanity. Building a router table is like embarking on a quest to find the Holy Grail of woodworking. It requires precision, determination, and a healthy dose of humor to survive the inevitable mishaps. So grab your tools, put on your safety goggles (because we don't want any wood chips in your eyes), and let's dive headfirst into the wonderful world of router table construction!
An interesting fact about making a router table is that it can be created using repurposed materials, such as an old kitchen countertop or a discarded piece of furniture. By upcycling these items, not only can you save money, but you also contribute to reducing waste and promoting sustainability in woodworking.
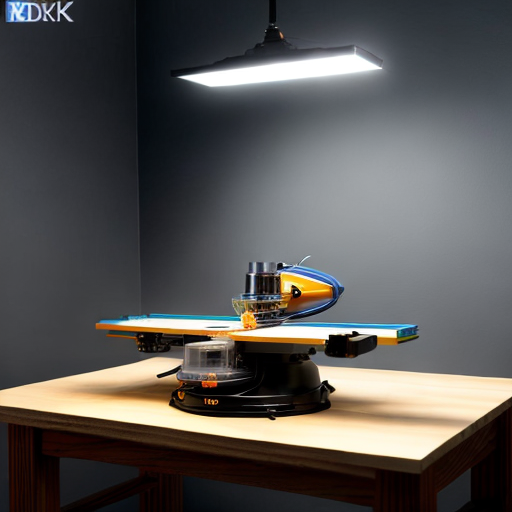
Now that you've mustered up the courage to tackle the daunting task of building your own router table, it's time to gather the essential tools and materials. Think of it as a shopping spree for the DIY enthusiast in you. You'll need a sturdy workbench to serve as the foundation for your masterpiece, along with a trusty circular saw to make those precise cuts. Don't forget to stock up on screws, wood glue, and clamps to hold everything together. And of course, no router table is complete without a high-quality router, so make sure to invest in one that will make your woodworking dreams come true. So grab your shopping list, put on your tool belt, and let's get ready to turn that pile of wood into a router table that would make even Tim 'The Tool Man' Taylor proud!
Alright, my fellow woodworking enthusiasts, it's time to roll up our sleeves and dive into the nitty-gritty of building the base and frame of your very own router table. This step-by-step guide will take you from a pile of lumber to a sturdy foundation for all your routing adventures.
Step 1: Measure Twice, Cut Once Before you start cutting any wood, take a moment to carefully measure and plan out the dimensions of your router table base. Remember, precision is key here, so grab your trusty tape measure and double-check those measurements. Once you're confident in your calculations, mark the dimensions on your lumber and get ready to make some cuts.
Step 2: Cut It Out Using your circular saw or table saw, carefully cut the pieces of lumber according to your measurements. This will include the top and bottom panels, as well as the sides and any additional support pieces you may need. Take your time with this step, ensuring clean and accurate cuts.
Step 3: Assemble the Base Now that you have all your pieces cut, it's time to start assembling the base of your router table. Begin by attaching the sides to the top and bottom panels using wood glue and screws. Make sure everything is aligned properly and use clamps to hold the pieces together while the glue dries. This will ensure a sturdy and stable base for your router table.
Step 4: Reinforce and Support To add extra strength and stability to your base, consider adding support pieces or braces. These can be attached to the inside of the base, providing additional reinforcement. Use wood glue and screws to secure these supports in place, making sure they are flush with the edges of the base.
Step 5: Level It Out Once your base is assembled, it's important to ensure that it is level. Use a level tool to check for any unevenness and make adjustments as necessary. This will ensure that your router table sits flat and stable on your workbench.
Step 6: Frame It Up Now that your base is complete, it's time to build the frame for your router table. This will provide additional support and stability to the overall structure. Cut the frame pieces according to your desired dimensions and attach them to the base using wood glue and screws. Make sure the frame is square and level before securing it in place.
Step 7: Finishing Touches With the base and frame complete, you're almost there! Take a moment to sand down any rough edges or surfaces, ensuring a smooth and professional finish. You can also apply a coat of paint or varnish to protect the wood and give your router table a polished look.
And there you have it, my friends - a step-by-step guide to building the base and frame of your very own router table. Now, take a moment to pat yourself on the back for a job well done. But remember, this is just the beginning of your router table journey. Stay tuned for the next installment, where we'll tackle the exciting world of adding a router plate, fence, and other essential components to complete your masterpiece. Happy woodworking!
Fun fact: Did you know that you can make a router table using just a few simple materials? All you need is a sturdy piece of plywood or MDF, a router, some screws, and a few basic tools. By attaching the router to the underside of the plywood and creating a fence to guide the wood, you can transform a regular table into a versatile router table. It's a cost-effective and creative way to enhance your woodworking skills!
Now that you have successfully built the base and frame of your router table, it's time to move on to the next crucial step - designing and installing the router mount. This is where the magic happens, my friends. The router mount is like the crown jewel of your table, holding your router securely in place and allowing for precise adjustments. Take some time to carefully measure and plan out the dimensions of your router mount, ensuring a snug fit for your specific router model. Once you have your design ready, use a jigsaw or router to cut out the opening in the tabletop. Then, attach the router mount using screws or bolts, making sure it is level and secure. Voila! Your router table is one step closer to becoming a woodworking powerhouse. Stay tuned for the next installment, where we'll explore the world of adding a fence and other essential components to complete your ultimate router table setup. Happy routing!