So, you've decided to take on the task of polyurethaning your table, huh? Well, buckle up and get ready for a wild ride! Before you can dive into the magical world of transforming your plain old table into a shiny masterpiece, you need to prepare the table surface. Think of it as giving your table a spa day, minus the cucumber slices on the eyes. First things first, give your table a good cleaning. Get rid of any dirt, grime, or mysterious sticky substances that may have taken up residence on its surface. Then, grab some sandpaper and gently rough up the table, giving it a nice exfoliation to ensure the polyurethane has something to grip onto. Just remember, your table will thank you for this pampering session by looking absolutely fabulous once it's all said and done.
An interesting fact about polyurethaning a table is that polyurethane is a versatile and durable finish that can protect your table from various elements, including heat, moisture, and scratches. It not only enhances the natural beauty of the wood but also provides a long-lasting protective layer that can withstand everyday wear and tear. Additionally, polyurethane comes in different finishes, such as glossy, satin, or matte, allowing you to choose the desired look for your table.
Alright, my fellow DIY enthusiasts, it's time to talk about the art of applying polyurethane to your beloved table. Picture yourself as a master painter, but instead of a canvas, you're working with wood. First things first, gather your tools of the trade. You'll need a high-quality brush or foam applicator to spread the polyurethane evenly. Remember, a steady hand is key here, so channel your inner Zen master and keep those brush strokes smooth and consistent. If you want to take it up a notch, you can even use a sprayer for a flawless finish. Just be sure to work in a well-ventilated area, unless you want to experience a polyurethane-induced high that rivals the best of them. So, grab your tools, embrace your inner artist, and let the polyurethane magic begin!
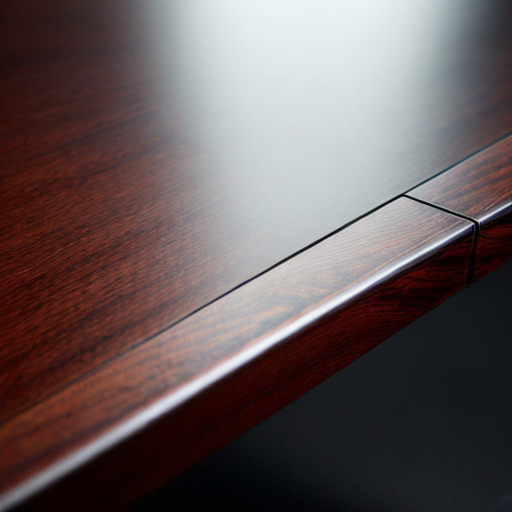
Ah, the final steps in the polyurethane journey - sanding and buffing. This is where the true magic happens, my friends. Once your table has been graced with a few coats of polyurethane, it's time to take it to the next level and achieve that professional, glossy finish. But first, grab your sandpaper and get ready to smooth out any imperfections. Start with a fine-grit sandpaper and gently sand the surface, going with the grain of the wood. This will help to remove any brush marks, drips, or bubbles that may have appeared during the application process. Remember, patience is key here. Take your time and let the sandpaper work its magic. Once you're satisfied with the smoothness of the surface, it's time to bring out the big guns - the buffing pads. Attach a buffing pad to a handheld buffer or a drill with a buffing attachment, and get ready to witness the transformation. Apply a small amount of polishing compound to the pad and gently buff the surface in circular motions. This will help to bring out the shine and create that professional, showroom-worthy look. Keep buffing until you can practically see your reflection in the table. And there you have it, my friends - a table that's been polyurethaned to perfection. So sit back, admire your handiwork, and revel in the fact that you've just transformed a plain old table into a work of art. Cheers to you, the master of polyurethane!
Fun fact: Did you know that polyurethane, a popular finish for tables, is actually a type of plastic? It is made by combining a polyol (a type of alcohol) with a diisocyanate (a type of chemical compound). So when you polyurethane a table, you're essentially giving it a protective plastic coating that enhances its durability and beauty!
Now that you've successfully polyurethaned your table and achieved that stunning finish, it's time to talk about maintenance and longevity. Like any masterpiece, your table requires a little TLC to keep it looking its best. First and foremost, avoid placing hot or wet items directly on the surface, as this can cause damage or unsightly marks. Instead, use coasters and placemats to protect your table from potential harm. Regularly dusting and wiping down the surface with a soft cloth will help to keep it clean and free from debris. If you notice any scratches or wear over time, don't fret! Simply sand the affected area lightly and apply a fresh coat of polyurethane to restore its beauty. With proper care and attention, your polyurethane-finished table will continue to shine for years to come, becoming the envy of all your friends and family. So go ahead, enjoy your masterpiece and revel in the fact that you've created a table that's not only beautiful but built to last.