So, you've decided to embark on the noble quest of repainting your wood table. Bravo! But before you dive headfirst into a sea of paint cans and brushes, let's talk about the essential steps for preparing the wood surface. First things first, you need to give your table a good cleaning. No, not just a gentle wipe with a damp cloth – we're talking about a thorough scrubbing session. Get rid of all those mysterious stains, crumbs, and that sticky residue from that unfortunate pancake syrup incident. Once your table is squeaky clean, it's time to sand it down. Think of it as giving your table a spa treatment, but with sandpaper instead of cucumber slices. Smooth out any rough patches, say goodbye to splinters, and create a surface that's as smooth as a baby's bottom. Finally, don't forget to prime your table before applying the paint. Just like a superhero needs a secret identity, your table needs a layer of primer to ensure the paint adheres properly and stays put. So, my fellow DIY warriors, remember these essential steps, and may your repainting project be as successful as a squirrel's mission to hide acorns.
An interesting fact about repainting a wood table is that using a primer before painting can significantly enhance the durability and longevity of the new paint job. Primer creates a smooth and even surface for the paint to adhere to, preventing it from chipping or peeling off easily. Additionally, primer helps to seal the wood, preventing any stains or tannins from bleeding through the new paint. This step is especially crucial when repainting a table that has previously been stained or has a glossy finish, as it ensures better adhesion and a more professional-looking result.
So, you've conquered the first hurdle of preparing your wood table for a repaint. Now, it's time to dive into the exciting world of choosing the right paint and tools. Think of it as a quest for the Holy Grail, but instead of knights and castles, you'll be surrounded by paint swatches and hardware stores. When it comes to selecting the perfect paint, consider the type of finish you desire – do you want a glossy, satin, or matte look? And don't forget about durability – you want a paint that can withstand the occasional spilled glass of wine or enthusiastic dinner party. As for tools, arm yourself with a high-quality brush or roller, depending on your preference, and don't skimp on the painter's tape – it's like the superhero cape that keeps your edges crisp and clean. So, my fellow DIY warriors, choose your paint and tools wisely, and may your wood table transformation be as epic as a dragon slaying adventure (minus the fire-breathing, of course).
Alright, fellow DIY enthusiasts, buckle up because we're about to embark on a step-by-step journey to achieve a smooth and professional finish for your wood table repaint. First things first, make sure you have all the necessary materials at hand – your chosen paint, primer, sandpaper, painter's tape, brushes or rollers, and a drop cloth to protect your surroundings from any accidental paint splatters. Now, let's get started!
Step 1: Prep the Surface Begin by removing any hardware or accessories from your table, such as knobs or handles. This will make the painting process much easier and ensure a clean finish. Next, give your table a good cleaning using a mild detergent and warm water. Scrub away any dirt, grime, or old paint remnants, and let it dry completely.
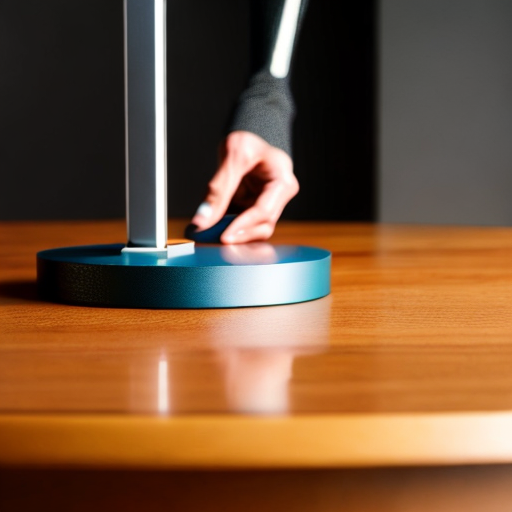
Step 2: Sand it Down Grab your sandpaper and start sanding the entire surface of the table. This step is crucial as it helps to smooth out any imperfections, remove old finishes, and create a surface that the new paint can adhere to. Start with a coarse-grit sandpaper to tackle any rough spots or stubborn paint, then switch to a finer-grit sandpaper for a smoother finish. Remember to sand in the direction of the wood grain for the best results.
Step 3: Prime Time Once your table is sanded and smooth, it's time to apply a coat of primer. This step is essential as it helps the paint adhere better and ensures a more even finish. Use a brush or roller to apply the primer, following the manufacturer's instructions. Allow it to dry completely before moving on to the next step.
Step 4: Paint Away Now comes the fun part – painting! Stir your chosen paint thoroughly to ensure an even consistency. Start by applying a thin and even coat of paint, working in the direction of the wood grain. Allow it to dry completely before applying additional coats. Depending on the desired opacity and coverage, you may need to apply multiple coats, allowing each one to dry before moving on.
Step 5: Finishing Touches Once your final coat of paint is dry, it's time to add those finishing touches. If you desire a glossy or satin finish, you can apply a clear topcoat to protect the paint and give it a polished look. Reattach any hardware or accessories that you removed earlier, and voila – your wood table has been transformed!
Remember, patience is key throughout this process. Take your time, allow each coat to dry thoroughly, and don't rush the sanding or painting steps. With a little bit of effort and a touch of creativity, your wood table will be sporting a smooth and professional finish that will make it the envy of all your friends. So, grab your paintbrushes, my fellow DIY warriors, and let's turn that table into a work of art!
Did you know that repainting a wood table can actually be a great way to unleash your creativity? You can transform a plain wooden table into a work of art by using different painting techniques such as stenciling, ombre, or even creating a unique pattern. So, not only will you have a beautifully repainted table, but you'll also have a one-of-a-kind piece that reflects your personal style and adds a fun touch to your space!
Now that you've successfully repainted your wood table, it's time to focus on those finishing touches and maintenance to ensure its durability and longevity. Consider applying a protective topcoat to safeguard your newly painted surface from scratches, spills, and everyday wear and tear. This extra layer of defense will not only enhance the table's durability but also make it easier to clean and maintain. Additionally, be mindful of placing hot objects or heavy items directly on the table to prevent any potential damage. Regularly dusting and wiping down the surface with a soft cloth will help maintain its pristine appearance. So, my fellow DIY enthusiasts, with a little extra care and attention, your repainted wood table will continue to shine and bring joy to your space for years to come.