So, you've got yourself a wooden table, huh? Well, let's assess the condition of that beauty before we embark on a restoration adventure. First things first, give it a good once-over and check for any scratches, dents, or suspicious stains. Don't worry, we won't judge – we all have our clumsy moments. Next, take a closer look at the finish. Is it dull and lackluster, or does it shine like a disco ball? If it's the former, we've got some work to do. Lastly, inspect those wobbly legs. If your table is doing the limbo dance every time you place a plate on it, it's time to tighten things up. Now that we've assessed the situation, grab your tools and let's restore that wooden table to its former glory!
An interesting fact about restoring a wooden table is that using mayonnaise can help remove water stains. Simply apply a small amount of mayonnaise to the stain, let it sit for a few hours, and then wipe it off. The oils in the mayonnaise can help lift the water stain, leaving your wooden table looking refreshed and stain-free.
Alright, fellow table restorers, it's time to roll up our sleeves and prepare that surface for a makeover. First things first, grab a gentle cleaner and wipe away any dust, grime, or mysterious sticky substances that may have taken up residence on your table. Give it a good scrub, but remember, we're not trying to erase its history – just clean it up a bit. Once it's dry, grab some sandpaper and gently sand away any rough patches or imperfections. Think of it as giving your table a spa day – exfoliating away the old to reveal the fresh and smooth underneath. Now that we've prepped the surface, get ready to unleash your restoration magic!
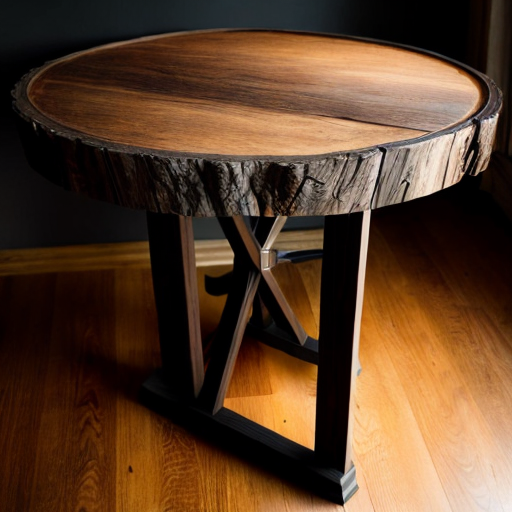
Alright, my fellow wood whisperers, it's time to bring out the big guns and restore that wooden table to its natural beauty. First things first, let's address any scratches or dents that may have accumulated over the years. Grab some wood filler and fill in those pesky imperfections, smoothing it out with a putty knife. Once it's dry, grab your sandpaper and gently sand the filled areas until they blend seamlessly with the rest of the table. Now, let's talk about that lackluster finish. To bring back that shine, we need to strip away the old and make way for the new. Grab some paint stripper and apply it generously to the table's surface, following the manufacturer's instructions. As the old finish starts to bubble and peel, grab a scraper and gently remove it, revealing the raw beauty of the wood beneath. Once the old finish is gone, it's time to sand away any remaining residue and smooth out the surface. Ah, the smell of freshly sanded wood – it's like a breath of fresh air. Now, let's talk about staining. Choose a stain that complements your style and the wood's natural tones. Apply it evenly with a brush or cloth, following the grain of the wood. Let it soak in for a few minutes, then wipe away any excess. Allow the stain to dry completely before moving on to the next step. Finally, it's time to protect and seal that newfound beauty. Grab a clear polyurethane or varnish and apply it in thin, even coats, allowing each coat to dry before applying the next. This will not only protect your table from spills and scratches but also enhance its natural beauty. Once the final coat is dry, stand back and admire your handiwork. You've transformed a tired, worn-out table into a stunning centerpiece that will make your guests green with envy. So go ahead, gather your loved ones around, and let the compliments pour in. You've earned it, my friend. Cheers to the restoration journey!
Did you know that restoring a wooden table can be as simple as using a common household item? Applying mayonnaise to a wooden table and leaving it overnight can help remove water rings and restore its natural shine! The oils in mayonnaise work wonders in rejuvenating the wood, making it a quirky and effective solution for table restoration. Just remember to wipe off the excess mayo in the morning and enjoy your beautifully revived table!
Now that you've restored your wooden table to its former glory, let's talk about those finishing touches and maintenance tips to keep it looking fabulous. First, consider adding some felt pads or coasters to protect the table from scratches and heat marks. This will ensure that your hard work lasts for years to come. Additionally, regular cleaning is key to maintaining its beauty. Use a soft cloth or microfiber duster to remove dust and debris, and avoid harsh chemicals that can damage the finish. If you notice any spills, be sure to clean them up promptly to prevent staining. Lastly, consider giving your table a little love every now and then with a coat of furniture polish or wax. This will not only add a lustrous shine but also provide an extra layer of protection. With these finishing touches and maintenance tips, your restored wooden table will continue to be the star of your home for years to come.