So, you've decided to take on the noble task of sanding and staining a table. Bravo! Now, before you dive headfirst into this adventure, let's talk about preparing the table. Think of it as the warm-up before a marathon, except instead of stretching your muscles, you'll be stretching your patience. First things first, clear the area of any delicate objects that might get caught in the crossfire. You don't want your grandmother's antique vase to become a casualty of your DIY enthusiasm. Next, grab your trusty sandpaper and start sanding away those imperfections like a superhero erasing villains from the face of the earth. Remember, sanding is all about creating a smooth surface, so be gentle yet firm, like a masseuse with a grudge. Once you've achieved the smoothness of a baby's bottom, it's time to move on to staining. Choose a stain color that speaks to your table's soul, whether it's a rustic oak or a bold ebony. Apply the stain with the grace of a ballerina, making sure to cover every nook and cranny. And voila! You've just transformed your table from a plain Jane to a stunning masterpiece. Now, sit back, admire your handiwork, and maybe even give yourself a pat on the back. You've earned it, my friend.
An interesting fact about sanding and staining a table is that the process of sanding not only smoothens the surface but also opens up the wood's pores, allowing it to absorb the stain more evenly. This helps to enhance the natural beauty of the wood grain and create a more vibrant and rich finish.
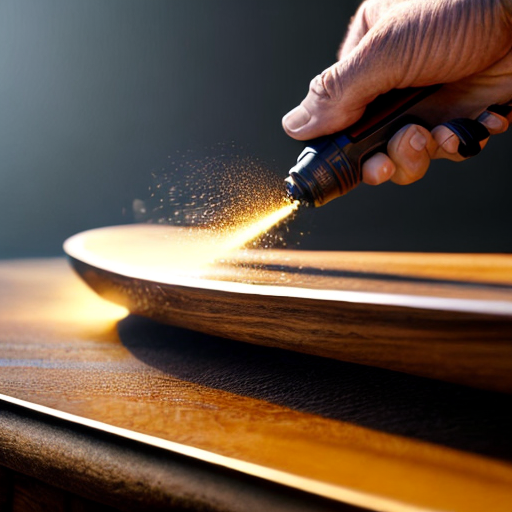
Alright, let's talk sanding techniques for a smooth and even surface on your beloved table. First off, grab your sandpaper and hold it like a knight gripping his sword, ready to battle imperfections. Start with a coarse grit sandpaper, like a warrior charging into battle, to tackle any rough spots or stubborn stains. Move in a circular motion, applying even pressure, as if you're giving your table a gentle massage. Once you've conquered the rough terrain, switch to a finer grit sandpaper, like a wise sage imparting wisdom, to refine the surface. This time, sand with the grain of the wood, as if you're stroking a majestic unicorn's mane. Remember, patience is key here. Take breaks, sip some coffee, and admire your progress. Before you know it, your table will be as smooth as a baby's bottom, ready to be stained and admired by all who lay eyes upon it. So, sand on, my friend, and may your table be the envy of all other tables in the land.
Choosing the right stain and applying it to your table is like finding the perfect shade of lipstick for a night out - it can make all the difference. So, let's dive into the world of stains and unleash your inner interior designer. First things first, consider the style and vibe you want to achieve. Is your table going for a rustic farmhouse look or a sleek modern aesthetic? Once you've nailed down the vibe, it's time to choose the stain color. Think of it as selecting the perfect outfit for your table. Do you want a classic and timeless look with a rich mahogany stain? Or perhaps a bold and daring statement with a vibrant cherry red? The choice is yours, my friend. Now, onto the application process. Grab a clean, lint-free cloth or a foam brush, and get ready to work your magic. Start by applying a thin, even coat of stain, working with the grain of the wood like a gentle breeze caressing a field of wheat. Take your time, ensuring that every inch of the table is covered. Once the first coat is dry, it's time for the second coat. This is where the real transformation happens. Apply the second coat with the precision of a surgeon, making sure to fill in any missed spots or uneven areas. And remember, patience is key. Allow the stain to dry completely before moving on to the next step. Now, stand back and admire your masterpiece. Your table has gone from a plain Jane to a showstopper, thanks to your impeccable stain choice and flawless application. So, go ahead, invite your friends over, and bask in the glory of your newly stained table. You've earned it, my friend.
Fun fact: Did you know that sanding a table before staining not only helps to remove any imperfections and smooth out the surface, but it also opens up the wood's pores? This allows the stain to penetrate deeper, resulting in a richer and more vibrant color. So, remember to give your table a good sanding session before staining to achieve a stunning finish!
Now that you've successfully stained your table and it's looking like a work of art, it's time for the finishing touches - sealing and protecting your masterpiece. Think of it as giving your table a suit of armor to defend against the perils of everyday life. Grab a clear polyurethane sealer, like a shield-wielding knight ready for battle, and apply it with a foam brush or a clean cloth. Make sure to cover the entire surface, including the edges and legs, with smooth and even strokes. This protective layer will not only enhance the beauty of the stain but also guard against spills, scratches, and the occasional rogue elbow. Allow the sealer to dry completely, following the manufacturer's instructions, and then give your table a gentle buff with a fine-grit sandpaper to smooth out any imperfections. And there you have it - a table that's not only stunning but also ready to withstand the test of time. So, sit back, relax, and enjoy your newly finished table. Cheers to your DIY skills and the joy of a beautifully sanded, stained, and protected piece of furniture!