So, you've decided to take on the task of staining your wood table. Good for you! Now, before you dive headfirst into this adventure, let's talk about preparing the wood surface. Think of it as giving your table a spa day, but instead of cucumber slices on its eyes, it gets a thorough sanding. Grab your sandpaper, put on some tunes, and get ready to show that table who's boss. Start by gently sanding the surface, making sure to remove any imperfections or old finishes. Remember, this is not a tickle fight with the table, so put some elbow grease into it! Once you're done, wipe away the dust like a magician revealing a clean slate. Now, your wood table is ready for its glamorous makeover. Let the staining games begin!
An interesting fact about staining a wood table is that the type of wood used can greatly affect the final color and appearance of the stain. For instance, if you were to apply the same stain to a pine table and an oak table, the pine table would likely absorb the stain more quickly and result in a lighter color, while the oak table would absorb the stain more slowly and produce a darker, richer hue. This is because different wood species have varying levels of porosity, density, and natural pigments, which can all influence how the stain interacts with the wood fibers. Therefore, it is important to consider the type of wood when choosing a stain to achieve the desired outcome.
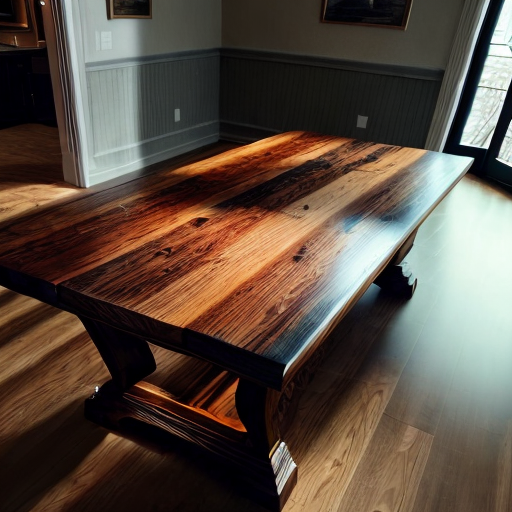
Now that you've prepped your wood table like a pro, it's time to choose the right stain and master the art of application. Think of yourself as a matchmaker, finding the perfect stain to bring out the table's natural beauty. Consider the color, the type of wood, and the desired finish. Once you've found 'the one,' it's time to get hands-on. Grab a brush or a cloth, whichever tickles your fancy, and start applying the stain in long, even strokes. Don't be shy, give that table a generous coat of love. Just remember to wipe off any excess stain, unless you want your table to look like it's been crying tears of color. Now step back and admire your handiwork. You've transformed a plain wood table into a stunning masterpiece. Bravo!
Alright, my fellow wood-staining enthusiasts, let's dive into the world of enhancing our stain game with a pre-stain conditioner or wood filler. Picture this: you've got your wood table prepped and ready for its moment in the spotlight, but there are a few imperfections that need some extra attention. Fear not, for we have the tools to tackle these challenges head-on. Enter the pre-stain conditioner, a magical elixir that helps even out the absorption of stain on different areas of the wood. It's like a primer for your table, creating a smooth and consistent surface for the stain to work its magic. Apply the conditioner with a brush or a cloth, making sure to follow the manufacturer's instructions. Now, if your table has some unsightly gaps or holes, it's time to bring in the wood filler. Think of it as the superhero that swoops in to save the day, filling in those imperfections and creating a seamless surface. Choose a wood filler that matches the color of your table, and apply it with a putty knife, smoothing it out until it's flush with the wood. Let it dry, then sand it down for a flawless finish. Now that your table is prepped and primed, it's ready to take on the stain like a champ. So go forth, my staining warriors, and create a masterpiece that will make even the most seasoned woodworkers green with envy.
Did you know that staining a wood table is like giving it a beautiful tan? Just like how you apply sunscreen to protect your skin from harmful UV rays, you can apply a pre-stain conditioner to the wood before staining. This conditioner acts as a barrier, preventing the wood from absorbing too much stain and resulting in a blotchy finish. So, remember to give your table some 'sunscreen' before staining to achieve a smooth and even color!
Now that you've successfully stained your wood table and it's looking absolutely fabulous, it's time for the finishing touches - sealing and protecting your masterpiece. Think of it as giving your table a suit of armor, ready to withstand the tests of time and everyday use. Choose a high-quality polyurethane or varnish that suits your desired finish - whether it's glossy, satin, or matte. Apply the sealant with a brush, following the wood grain, and make sure to cover the entire surface evenly. Allow it to dry completely, then lightly sand the table to smooth out any imperfections. Repeat this process for a few coats, ensuring maximum protection. Now, sit back and admire your beautifully stained and sealed wood table, knowing that it's ready to withstand spills, scratches, and all of life's little accidents. Cheers to a job well done!